Understanding Spider Lift Deployment Logistics
The common discourse on spider lifts tends to focus on their reach, capacity, and stability – even though getting spider lifts through doorways and deploying them right is just as critical.
While there’s no denying that specifications matter, the real challenge can be their dimensions. After these machines leave the trailer, you have to figure out how to deploy them. Conditions such as tight access points, finished landscaping, sensitive slabs, or shared urban spaces can make this task appear more complicated than it seems on paper.
But it doesn’t have to be. Especially if you are using one of our compact powerhouses. In today’s blog, Platform Basket Canada – Ontario’s top supplier of advanced access solutions, will map out strategic deployment logistics for you so you don’t have to worry about onsite bottlenecks.
How To Deploy Spider Lifts? A Phase-By-Phase Guide
For your convenience, we are going to break down our guide into phases or stages to simplify the process of spider lift deployment. Let’s begin.
Phase 1: Planning transportation before arrival
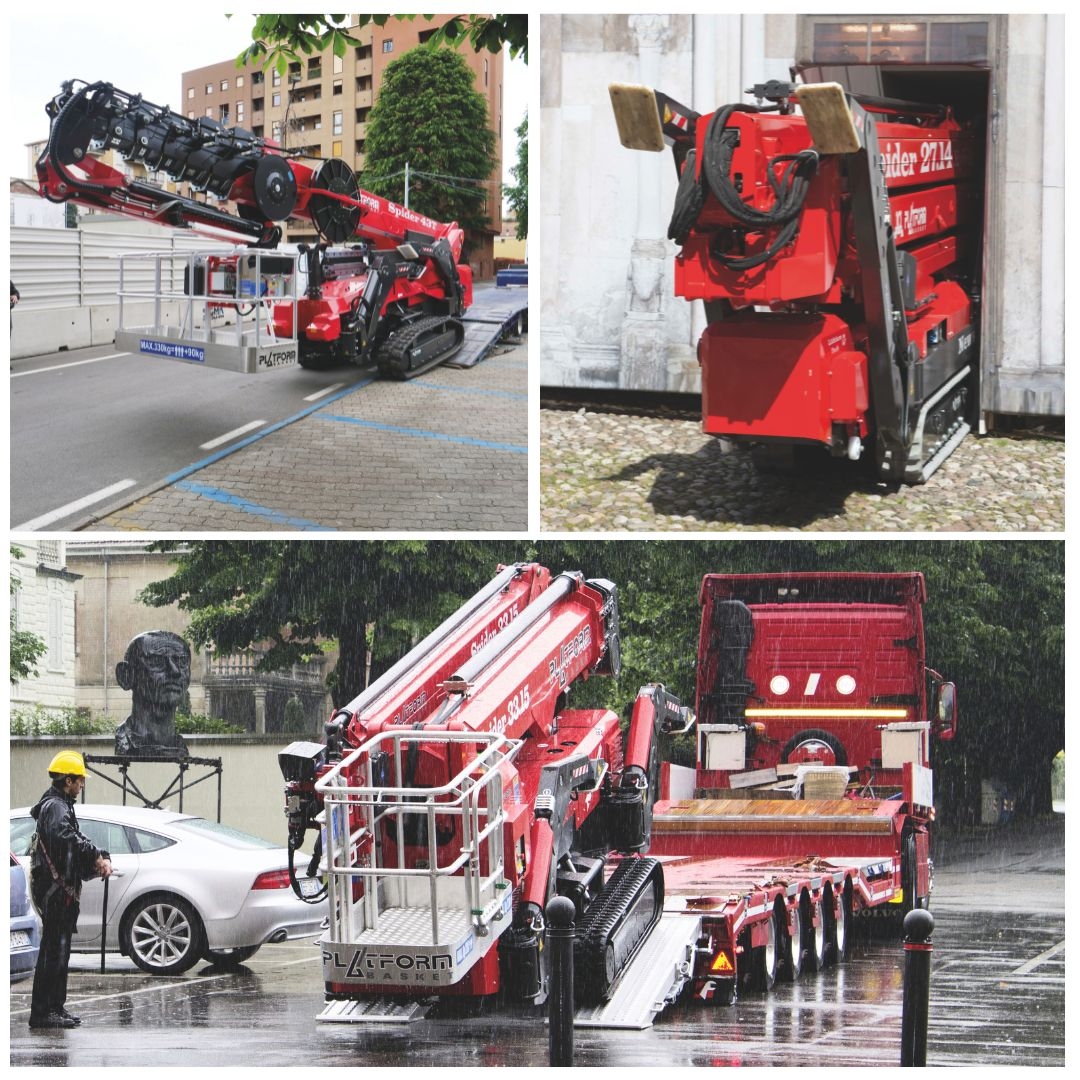
Trailers are the most common mode of transport for spider lifts. However, before the machine is dispatched to your site, verify the trailer’s towing capacity and braking compatibility to ensure it can handle the extra load without hiccups. Check route restrictions and urban delivery limitations, too, so you can schedule transportation accordingly. Especially, if the delivery site is located in dense urban areas, as they are highly likely to have time-restricted delivery windows.
Phase 2: Evaluate the site’s entry
We cannot vouch for aerial lifts from other brands, but our machines fold into a compact size that is capable of fitting through standard doorways with a 36” width and 80” height. As per the Ontario Building Code, doors in the province should be at least 32” (W) x 78” (H), but most builders prefer installing the sizes we mentioned previously, so you do not have to worry about our machines being too large to fit through.
Nonetheless, it makes sense to evaluate the entry point as a precautionary measure. We suggest inspecting the gate’s width and height, obstruction clearance, overhead obstacles, and threshold height differences. You should also factor in the ground conditions of entry paths, as ground stability can affect both transportation and set-up.
Phase 3: Select the staging area wisely
Set-up can only begin once you finalize a staging zone for your atrium lift. However, the staging area cannot be chosen on a whim. It should ideally be located on a spot that isn’t prone to traffic – pedestrian or vehicular, has minimal overhead obstructions, and is in proximity to the access path. This way, you can minimize unnecessary repositioning.
That said, if the staging area is not immediately available, you can create a temporary holding location provided it ensures machine stability, reduces onsite disruptions, and keeps major pathways clear.
Phase 4: Planning set-up
The next major task on your list is developing a sound set-up strategy based on the footprint of your particular atrium lift model. Irrespective of their size, these machines need a stable surface to stand on before they can be extended to access various heights.
We suggest evaluating available ground area for stability and possible obstructions before narrowing down on a spot. Also, be sure to assess ground load distribution. Avoid setting up on sensitive slabs or landscaping unless you use the machine’s outriggers combined with load-spreading pads to prevent surface damage.
Phase 5: Clearly define machine movement paths
The major advantage of having spider lifts on-site is that you can use them in multiple working positions to get a wide variety of tasks done in one shift. However, repositioning has to be planned carefully, and ideally, before elevation begins.
To ensure smooth, incident-free repositioning, ground crews must evaluate whether movement routes continue to remain accessible after the accumulation of debris or materials on-site. For jobs that require frequent repositioning, establishing obstacle clearance and alternate access strategies is critical to minimize disruptions and unnecessary movement.
Conclusion
It might seem like a Herculean task, but spider lift deployment and set-up do not have to be daunting. By following a phased strategy as we have mentioned above, you can ensure the safe and efficient transportation, set-up, and deployment of your machine.
Looking for compact access solutions that meet the demands of your jobsite while fitting effortlessly into your logistical plans? Platform Basket Canada’s spider lifts are known for their lightweight footprint and easy mobility in Ontario. Contact us to explore our range of capable and powerful machines.
FAQs
Can spider lifts be unloaded on sloped surfaces?
While not advised, spider lifts can be unloaded on sloped surfaces provided the ground conditions offer safe transport and stabilization.
Is the set-up footprint larger than the width of a spider lift?
Typically, yes, because stabilization systems of a spider lift tend to expand its effective working footprint.
Why is it important to plan spider lift repositioning?
To maintain on-site productivity and safety, it is important to plan spider lift repositioning as frequent or repeated movements can compromise both.